Jerk Engineered Products
Mule Back XL Installation
Mule Back XL Installation
Couldn't load pickup availability
Installation Description for Mule Back XL
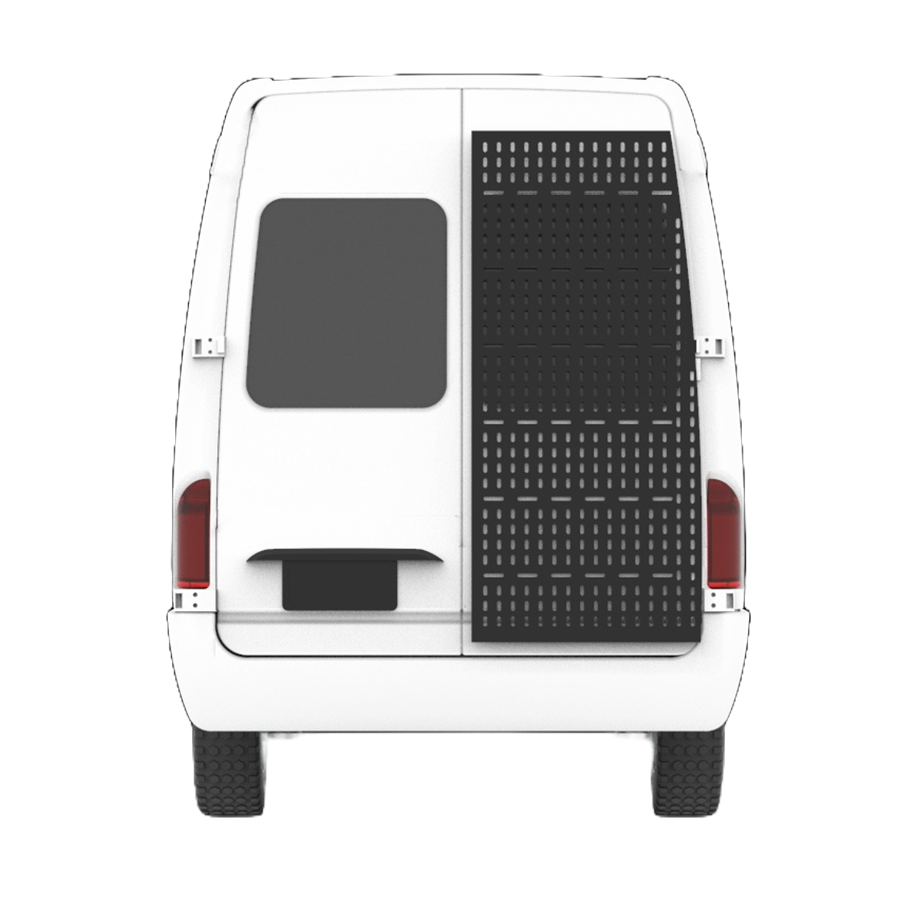
Product Overview: The Mule Back XL is a versatile carrier system that completely covers your rear operable door while maintaining ease of operation for both doors. It offers limitless configuration options for mounting cargo boxes, skis, bikes, water, and more. The Mule Back XL is laser cut to precision from a solid piece of plate aluminum, designed for you to configure as you wish and change based on your trip or the season.
Innovative Design: Our patent-pending design does not piggyback off the hinges of the van, eliminating the need for 180-degree hinges. The Mule Back XL is engineered to handle the toughest terrain and harshest environments, making it perfect for off-road adventures and overlanding.
Installation Steps:
-
Preparation:
- Gather all necessary tools and components included in the package.
- Ensure the vehicle is parked on a flat surface and the rear door is accessible.
-
Mounting Hole Drilling:
- Drill a mounting hole in the door near the rear Mercedes symbol and a larger one directly opposite it inside the door, hidden behind the interior trim panel.
- Additionally, drill two mounting holes at the very top and one at the very bottom of the Mule Back XL.
- Use the provided templates and instructions to ensure accurate placement.
-
Reinforcement Plate Installation:
- Attach the exterior and interior reinforcement plates to the drilled holes.
- Secure them with the provided fasteners to ensure a strong and stable mount.
-
Hinge Bracket Attachment:
- Mount the structural hinge brackets to the existing hinges of the van.
- Ensure the brackets are securely fastened and aligned properly.
-
Rack Installation:
- Attach the Mule Back XL to the hinge brackets using the provided hardware.
- Adjust the rack to accommodate your specific accessories and setup.
-
Final Adjustments:
- Check all connections and fasteners to ensure everything is secure.
- Test the rack by loading and unloading items to ensure smooth operation.
DIY Installation: The Mule Back XL is designed for easy DIY installation. Detailed step-by-step instructions and a video guide are included to assist you throughout the process. Due to its size, it is recommended to have two people for the installation. No need to change out your hinges—keep your original hinges, which are painted the color of your van!
Professional Installation Service: For those who prefer professional installation, we offer on-site installation services at our Sedalia, CO facility for $350. Call (720)-375-3119 to schedule an appointment, and our team will ensure a seamless installation experience.
Product Highlights:
- All TIG-welded aluminum construction
- Available in Black (Primary), White, Silver, and Pebble Gray
- 5-point mount system with reinforcement plates and inner load dispersion plates
- Compatible with VS30 vans (2019-Present) 2500, 3500, 4x4 & 4x2 models
- Designed and manufactured in Denver, Colorado, with all materials made in the USA
Important Notes:
- Rear door should be closed carefully and purposely, with a firm, controlled closure.
- Save money by not needing to change out your hinges!

-

DURABILITY
-

COMPATIBILITY
-

EASY INSTALLATION
-

WEATHER RESISTENT
-

HIGH LOAD CAPACITY


